Beauty Craft

PAINT IT OR KEEP IT FRENCH?

LIFE IS NOT PERFECT BUT YOUR NAILS CAN BE!

..

In this blog post, I am taking you to the most interesting comparison or opinionated nail theory regarding your nails. A million-dollar question is whether you want to keep them painted sophisticatedly or you want to go elegant by doing a French manicure. The debate is endless and so are the discussions. But to each his own, if you ask me I totally go with the time and occasion or probably season to carry one out of the two. But here I am going to compare both of these nail trends which I was eyeing to do for so long.

The difference between the polished and scruffy is in the way you paint your nails. Do try both of these looks this summer.

But before moving so we have to keep a few things in mind :

a) Exfoliate your hands and nails before applying nail polish.

b) Remove all traces of old polish and clean dry your hands.

c) Oil in nails can deter polish from being applied evenly.

d) Using a basecoat strengthens the nail. Some products help even out any imperfections or dips in the mail.

e) Nail polish peels off faster if you don’t dry each coat completely before applying a new coat.

f) If your nails have ridges use a ridge filler.

g) Taking Vit-B supplements regularly helps strengthen nails.

Let’s start with :

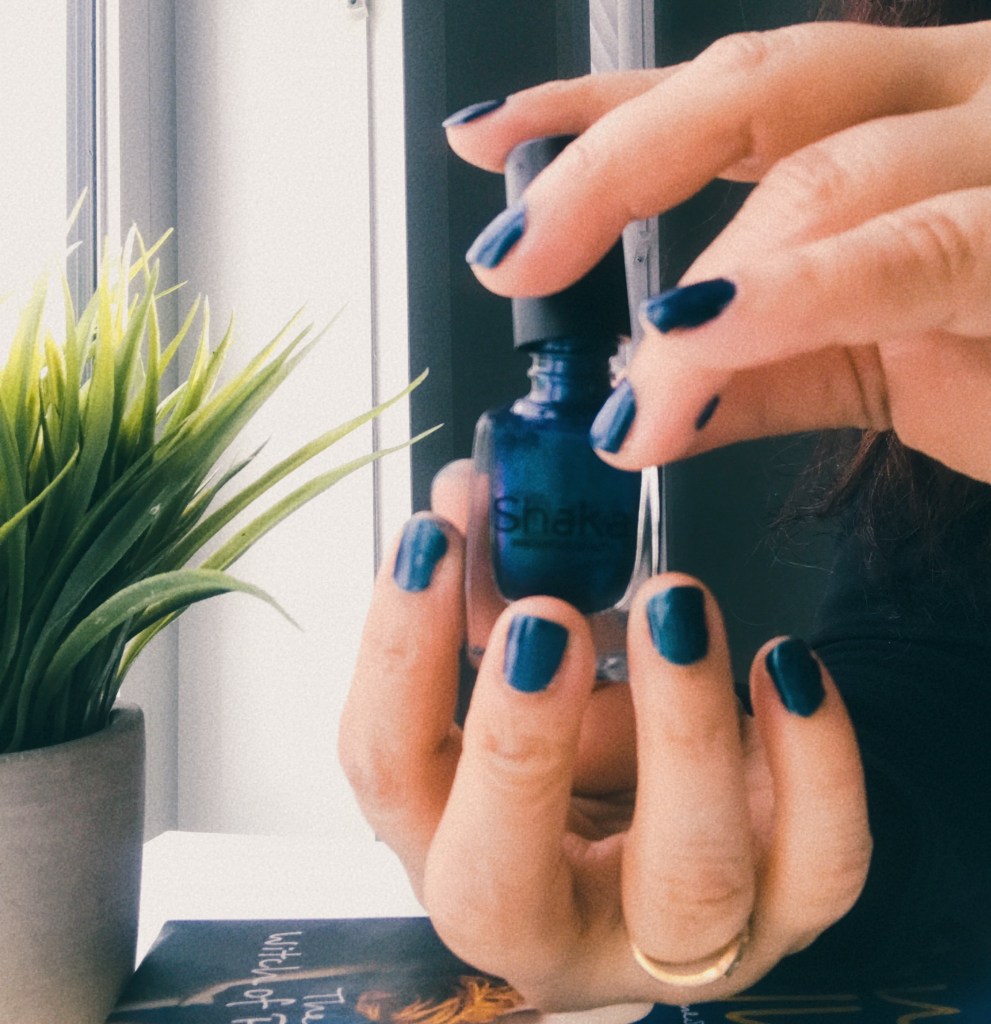
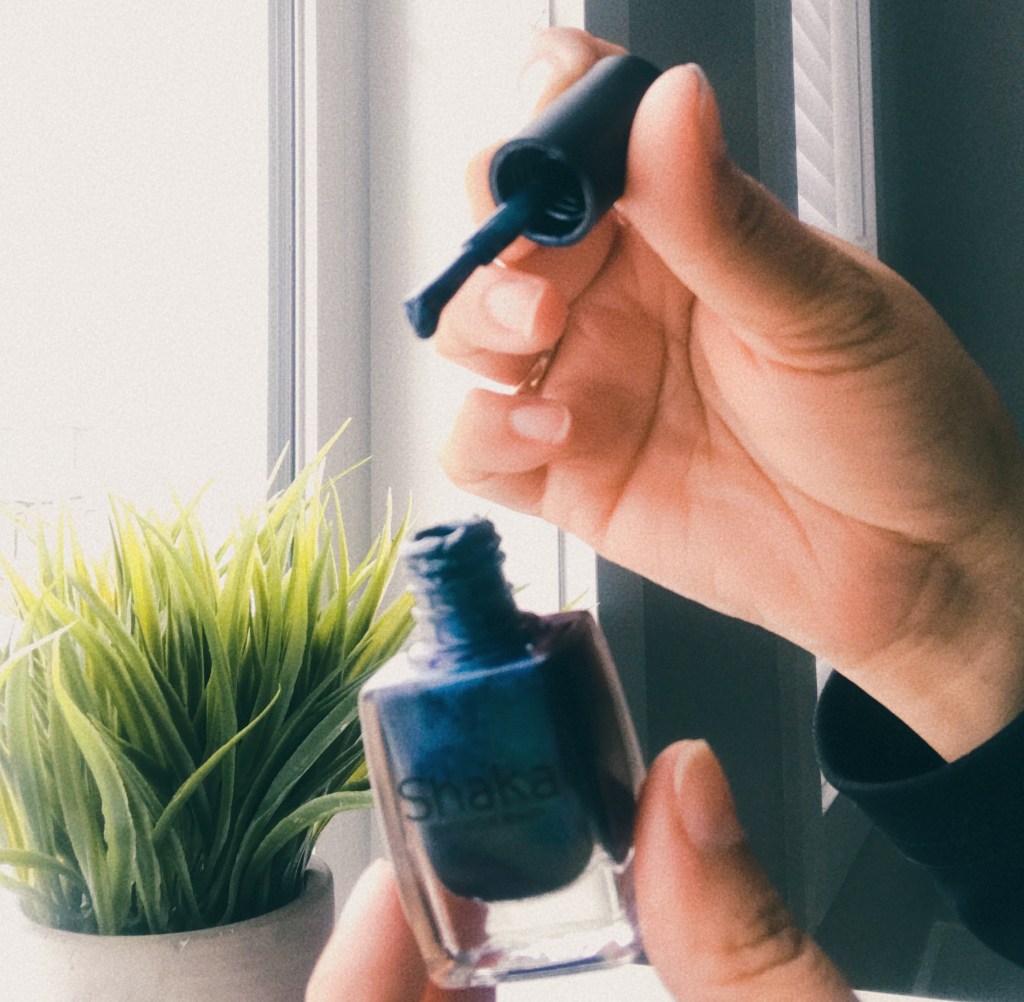
PAINTED SOPHISTICATION

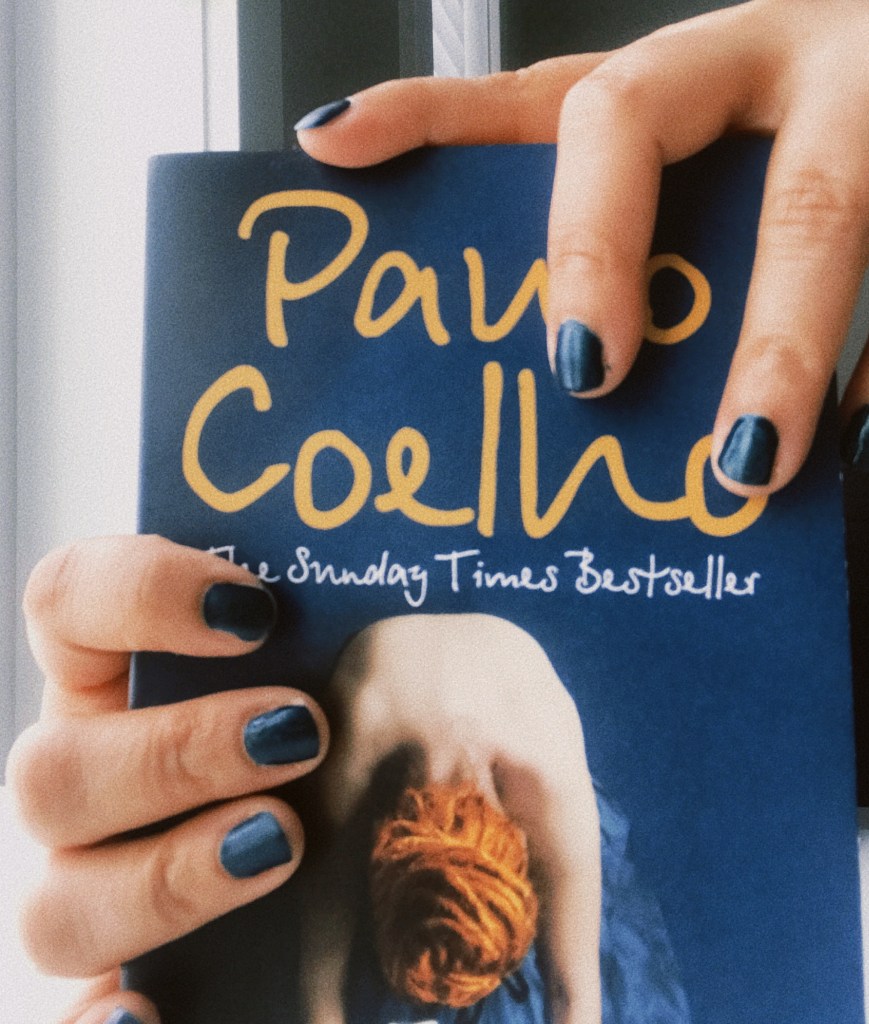
  1. Apply a base coat to your nails. let it dry completely.
  2. Dip the brush in the nail polish coat it completely, then wipe the brush on the inside edge of the bottle to remove any excess paint.
  3. Apply with the brush starting from the cuticle edge to the tip in a single sweep, positioning the brush to the center of the nail.
  4. Now apply the next stroke in a similar way to the left of the earlier stroke and then similarly on the right, doing this till you paint the entire nail. Then apply second coat.
  5. Finish it off with clear polish and let it dry completely.

PS: Move the bottle gently in between your palms instead of shaking it vigorously before applying, as it may cause air bubbles.
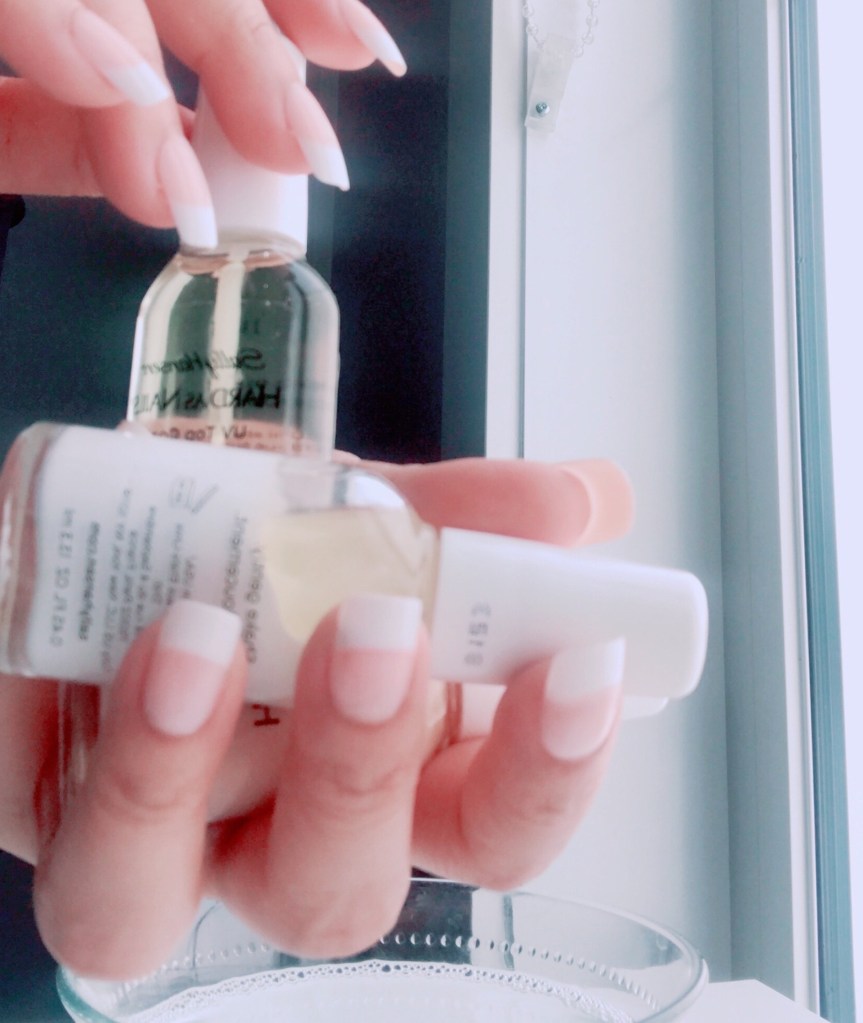
FRENCH ELEGANCE

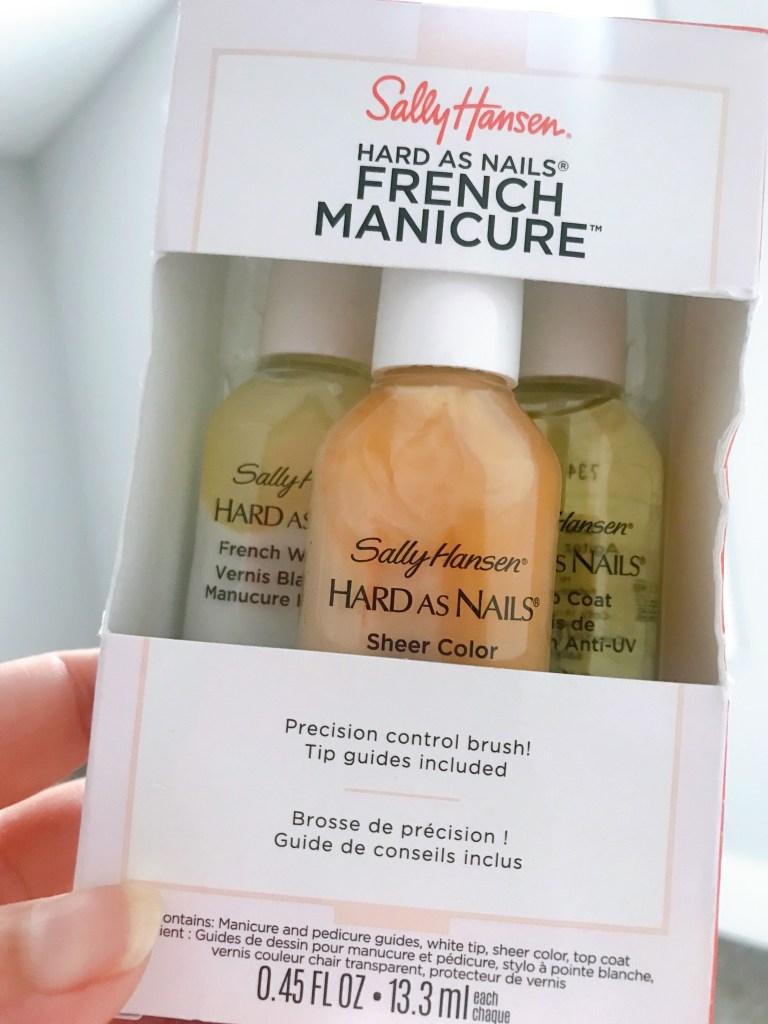
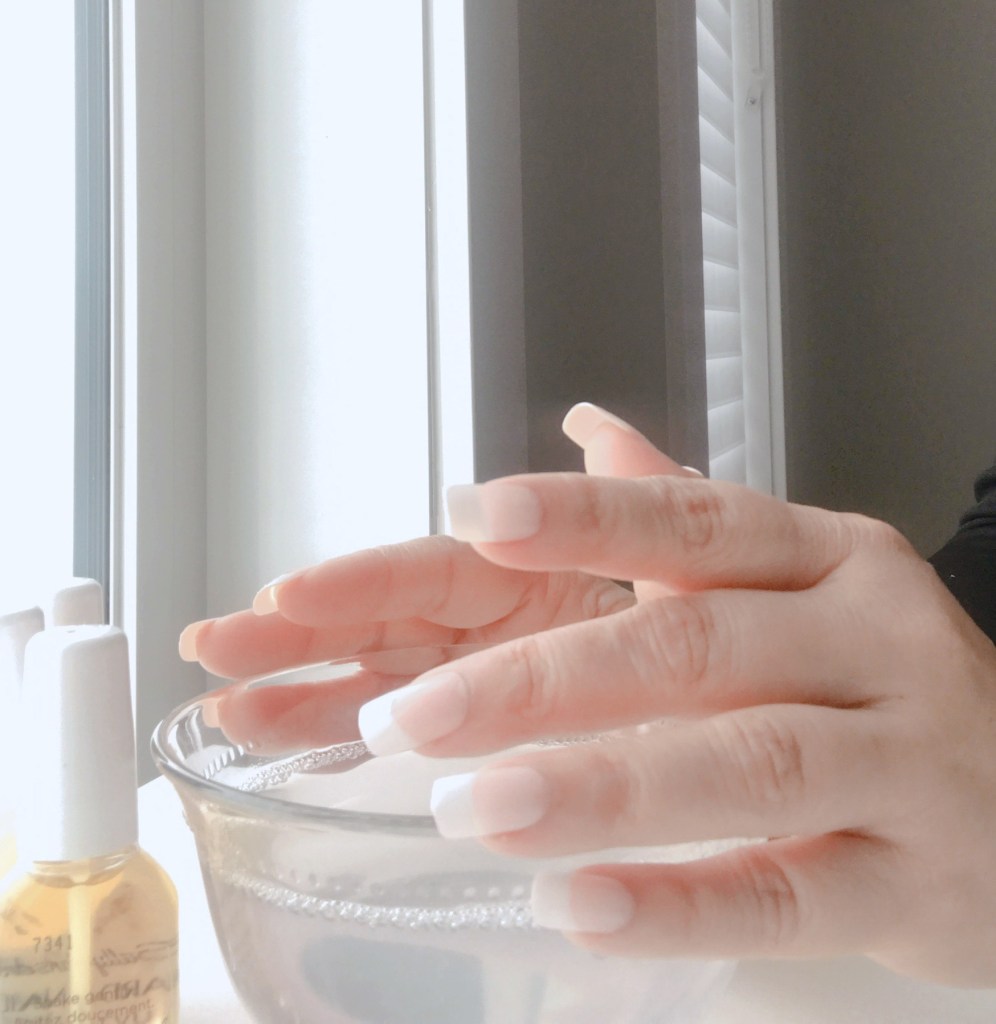
  1. Apply a base coat to your nail. Let it dry completely.
  2. Now place a tip guide on your nail that covers the bottom part of your nail and help you get a clear white tip.
  3. Use white polish to paint the tips of your nail in a clean motion, following the curve of your nail or painting straight if you want a sqaure tip. Let it dry.
  4. Now use a sheer or clear pink nail paint and paint over the whole nail from cuticle to to tip, following the instructions as mentioned in the single colour, let it dry and apply a second coat.
  5. Finish off with a coat of clear polish over the entire nail and let it dry completely.

PS: A clear polish gives your nails a proper finish. Applying a clear polish every couple of days will also make your french manicure last longer.

So above are a few steps to do the nail of your own like and kind. If you personally ask me I will definitely keep occasion or season in mind to actually nail this nail look. Hope you guys can try these simple steps to see how your nails come out to be. For painted nails, you can opt for any colour of your choice and for French Manicured nails at home you can buy a kit with everything inside it all you have to do is just follow the instructions.

So enjoy beautiful nails and Take care!

Stay safe! Stay Healthy!

Thank you for reading:)

Sweta “ka”

Rating: 4 out of 5.

#blogpost #healthyfoods#superfoods#healthiswealth#walnuts#yogurt#darkchocolate#kale#berries#dailyroutine#healthylifestyle bathandbodyworks beautyandcare beautycare Beauty Craft behealthy boldlook curlingrod eye makeup eyes eyeshadow face fashionbloggers fashioninspiration fashionstyle fashiontips featured foundation freshbeauty haircare haircurls hairdo hairdryer hair fixing spray hairserum hairstyle hairvibes hair volumiser HEALTH Health and Healing health benefits healthybody honey lips loreal makeup makeup.beauty makeupandbeauty makeupbrushes makeup do makeuptools mascara Moda scrub

Standard
Beauty Craft

TOUCH IT! AND BLEND OVER

BLEND IN YOUR OWN WAY

Anonymous

Wishing you had the kind of flawless, glowing complexion that only the soft-focus filter on your phone camera seems to achieve? Let’s introduce you to a real-world miracle worker, the Makeup Sponge. A beauty tool that helps you blend your foundation perfectly, the sponge ensures even coverage and is pretty easy to use, once you’ve learnt a few basic tricks.

INVINCIBLE EGG

The makeup sponge has been around for a long time. The most common ones were the stiff, triangle-shaped ones that were used to even out pancake foundations. But they had their own drawbacks, so when the egg-shaped Beauty Blender was created by Makeup artist Rea Ann Silva in 2002, it pretty much took the world by storm.

There are many makeup sponges available in the market and picking the right one makes a big difference. The sponge is soft on the skin and, unlike makeup brushes, it does not emphasize dry patches and flakiness.

SUPER SPONGE

These days makeup sponges are available in a variety of shapes and sizes and colours to suit every need. While the iconic egg-shaped Beauty Blender occupies a special position in most beauty kits. The best part is that they are available in all possible sizes. The really tiny ones are brilliant to use on the under eyes area. A few come with flat surfaces as well, which work perfectly for contour lines.

WHEN BUYING MAKEUP SPONGE

When buying a makeup sponge, look for something that is soft and porous. Small sponges are great for spot application to hide marks on acne. The pointed tip of the sponge is great to target smaller areas of your face such as the corners of the eyes and areas around your nose. The flat surface on some sponges is great for powder application and to cover larger areas on your face.

BLEND BASICS: DO’S AND DONT’S

  • Don’t use a dirty sponge or the same sponge for too many products. Mixing products on a sponge isn’t a great idea.
  • Only use a best quality or you will end up doing more than good.
  • Do not drag or rub the sponge on the skin; instead use a dab or roll motion.
  • After blending the foundation with a brush, dab rather than rub, the blender all over the face make sure you don’t remove products.
  • Dampen the sponge the right way and when you squeeze the waterout.

Blending sponge’s popularity is its versatility. Tend to use it to apply blush, moisturizer, corrector and highlighter to contour, define brows, apply eyeliner and also to tone a look and evenly apply powder on the face.

Blenders are every beauty expert’s go-to tool. You really need it in your life right now to change your beauty game.

I hope you like the post. Thank you for reading!

Sweta”ka”

Rating: 4 out of 5.

#blogpost #healthyfoods#superfoods#healthiswealth#walnuts#yogurt#darkchocolate#kale#berries#dailyroutine#healthylifestyle bathandbodyworks beautyandcare beautycare Beauty Craft behealthy boldlook curlingrod eye makeup eyes eyeshadow face fashionbloggers fashioninspiration fashionstyle fashiontips featured foundation freshbeauty haircare haircurls hairdo hairdryer hair fixing spray hairserum hairstyle hairvibes hair volumiser HEALTH Health and Healing health benefits healthybody honey lips loreal makeup makeup.beauty makeupandbeauty makeupbrushes makeup do makeuptools mascara Moda scrub

Standard
Beauty Craft

RASPBERRY RUSH

I BELIEVE ALL THE THE WOMEN ARE PRETTY WITHOUT MAKEUP BUT WITH THE RIGHT MAKEUP PRETTY POWERFUL

BOBBI BROWN

RASPBERRY RUSH

Fashion and Beauty choices are never predictable. Sometimes you want to go subtle sometimes bold, sometimes glittery and sometimes natural.

I really heart this berry-hued lip colour makeup tutorial. This winter it’s one of the juiciest colours of the season as they say” Berries for Winters”. This berry shade can be toned down for the day and amp for the night and will work on most skin tones. If you love to try this look as much as I did, here is the tutorial:

Let’s start with

FACE

The first thing you notice about this look is that it calls for a fuss-free base.

  • Start with a moisturiser
  • Follow up with a good eye cream. I picked Neutrogena as it suits me a lot.
  • Dab foundation on forehead, cheeks and chin and evenly blend it in with your finger tips or sponge.
  • Using a puff apply pressed powder and buff away with big powder brush.
  • Keep the cheeks bare for optimal look.

EYES

Need to keep the freshness of colours.

  • I am using shimmery and subdued pink eyeshadow all over the eyelids, starting from brow bone extending to lash line. Blend it well with an eyeshadow blending brush.
  • Next, take a small eyeliner brush and create winged liner with eyeshadow in purple. It does’t have to be perfect line, you can even smudge the corners out if you like.
  • Add the finishing touches with two generous coats of a volumising mascara.

LIPS

Depending on how intense you want your lips to look

  • Define the lips with lipstick brush before filling in the colour.
  • Apply two coats of your favourite Matte Lipstick in Raspberry Syrup.

If you notice, the makeup on the eyes is quite subtle and has natural undertones allowing the bold lip colour to stand out. I am in love with this matte Raspberry shade lipstick and always love to experiment with my wardrobe and makeup.

Love the makeup so much that I am going to try this out quite a few times, just love the freshness on the face after finishing the look. Do give it a try and drop a comment in the comment box that how you like it!

Thank you so much for reading! You can watch a tutorial of this amazing makeup look on my INSTAGRAM REEL.

Stay safe! Stay Beautiful from the inside out!

Sweta “ka”

Rating: 1 out of 5.

#blogpost #healthyfoods#superfoods#healthiswealth#walnuts#yogurt#darkchocolate#kale#berries#dailyroutine#healthylifestyle bathandbodyworks beautyandcare beautycare Beauty Craft behealthy boldlook curlingrod eye makeup eyes eyeshadow face fashionbloggers fashioninspiration fashionstyle fashiontips featured foundation freshbeauty haircare haircurls hairdo hairdryer hair fixing spray hairserum hairstyle hairvibes hair volumiser HEALTH Health and Healing health benefits healthybody honey lips loreal makeup makeup.beauty makeupandbeauty makeupbrushes makeup do makeuptools mascara Moda scrub

Standard
Beauty Craft

RADIANT ROSEGOLD MAKEUP

“LIFE ISN’T PERFECT, BUT YOUR MAKEUP CAN BE ROSE GOLD”

Anonymous

As they say, all that glitters is not gold “It is Rose Gold”. This unique Copper-Gold hue has been gracing us with its presence via accessories like watches, earrings, bags, neckpieces, shoes, and other stuff; but what impresses me most is the Rose Gold Makeup. From luminescent to luscious lids, rose gold is a wearable tone for any daily look makeup.

Rose Gold embodies both warm and cool qualities. Here in this blog, I am going to try and achieve a natural yet eye-catching rose gold makeup look, which you can incorporate it into your routine makeup look books to shimmer and shine together.

WHAT DO WE NEED

  • Moisturiser
  • Primer
  • Lip Balm
  • Foundation
  • Corrector and Concealer
  • Rose Gold Blush and Eyeshadow
  • Mascara
  • Transparent Lip Gloss

HOW DO WE DO IT

  • Prep your skin with hydrating moisturiser to revive dull skin.
  • Apply primer evenly on your face and neck for a clean canvas.
  • Swipe a lip balm on your lips to hydrate and soften them.
  • Blend foundation that matche your skin tone on your face and neck. Use blending brush for an even finish.
  • Apply corrector and concealer under your eyes to hide dark circles and make your eyes look fresh and awake.
  • Take your favourite Rose Gold blush or eyeshadow and apply it on your eyelids. You can swipe a little along lower waterline as well.
  • Swipe a few coats of mascara to open up your eyes.
  • Apply the same product (Rose gold blush or eyeshadow) on your cheeks for the rosy flush.
  • Swipe transparent lip gloss on your lips. Dab the rose gold blush/eyeshadow on your lips to finish your look.

Rating: 1 out of 5.

#blogpost #healthyfoods#superfoods#healthiswealth#walnuts#yogurt#darkchocolate#kale#berries#dailyroutine#healthylifestyle bathandbodyworks beautyandcare beautycare Beauty Craft behealthy boldlook curlingrod eye makeup eyes eyeshadow face fashionbloggers fashioninspiration fashionstyle fashiontips featured foundation freshbeauty haircare haircurls hairdo hairdryer hair fixing spray hairserum hairstyle hairvibes hair volumiser HEALTH Health and Healing health benefits healthybody honey lips loreal makeup makeup.beauty makeupandbeauty makeupbrushes makeup do makeuptools mascara Moda scrub

Standard
Beauty Craft

BEAUTY UNMASKED

The most beautiful face is always the face of the peaceful mind....

Does it ever cross your mind that you can micro-manage your skin concerns with a patchwork of mask for each zone of your face?

I examine the skin on my face and I’m sure most of us find that there are various skin issues like open pores, on cheeks, whiteheads, blackheads, and a dry T zone perhaps, and the discoloration on the forehead and around the mouth. So I was figuring out how is that even possible that one single mask can be used to address all the skin issues.

This is when multi-masking fits in as a one-step solution to take multiple concerns of your facial skin.

WHAT IS MULTI MASK

Applying different types of masks on different zones of our face according to dry and oily areas or to reduce discoloration or tan.

WHY MULTI-MASK

According to dermatologists, the distribution of sweat and oil glands differs from one portion of the face to another, even for the same person. Some people have combination skin like an oily T zone and dry cheeks.

So if they use a drying mask made of fullers’ earth for oil control all over the face the dry areas will go more dry and flaky. Hence it is better to apply a drying mask to the oily areas of the face, while a moisturizing mask works better for the dry areas.

HOW TO SELECT A MASK?

Not sure about the skin type of your face? Identify them by understanding the dry, oil, and sensitive patches. Applying five different masks on your face, almost like a painting. Collage will be worth your time.

WHAT SUITS WHERE?

Let’s find out. I used images to explain it in a better way with an amazing Nordic filter effect.

FOR EYES AREA

Masks with Vit C and K are good for the delicate skin around the eyes. Also, herbal formulations that cucumbers have will help soften fine lines.

FOR CHEEKS

For oily skin, opt for a mask with glycolic or salicylic acid. For dry skin collagen is effective. Also, aloe vera works well for sensitive and acne-prone skin.

FOR T-ZONE

The section on your face over the eyebrows and the nose tend to get very oily. Apply an oil-absorbing mask that has glycolic acid. Alternatively, fullers earth is a great option.

FOR MOUTH AND NECK

Apply brightening formulations around the mouth, up to the neck to even out your skin tone. A coffee and a honey scrub or a combination of cucumber and papaya can be prepared at home.

FOR THE NATURAL GLOW

After applying the various masks, keep them on for 15 min and relax. wash your face, pat dry and finish by applying a moisturizer suitable to your skin type.

Thank you for reading this

Have a happy and glowing skin folks!

Stay Healthy. Keep glowing

Sweta”ka’

PS: images are created by me to show various types of face areas and masks

Rating: 1 out of 5.

#blogpost #healthyfoods#superfoods#healthiswealth#walnuts#yogurt#darkchocolate#kale#berries#dailyroutine#healthylifestyle bathandbodyworks beautyandcare beautycare Beauty Craft behealthy boldlook curlingrod eye makeup eyes eyeshadow face fashionbloggers fashioninspiration fashionstyle fashiontips featured foundation freshbeauty haircare haircurls hairdo hairdryer hair fixing spray hairserum hairstyle hairvibes hair volumiser HEALTH Health and Healing health benefits healthybody honey lips loreal makeup makeup.beauty makeupandbeauty makeupbrushes makeup do makeuptools mascara Moda scrub

Standard